30% Off Divisimate until November 29 - Save now!

30% Off Divisimate until November 29

Summer Sale: Save 25% until July 19

Orchestrating Music with Divisimate

How to Get Started

Welcome to the home of Divisimate. 

In this Getting Started article, we’ll help you start orchestrating music with Divisimate by walking you through the concepts and features of this software. Please note that each section of this tutorial has its corresponding YouTube video or interactive graphic. You can skip to any section using the navigation menu on the left (on desktop).

Introducing Divisimate

When we started this project, our main goal was to make our own lives as composers easier. Some of the most expressive and playable virtual instruments out there are monophonic, meaning they can play only one note at a time. Using these instruments for chords or creating ensemble orchestrations meant either playing every part one at a time, or performing an ensemble patch and separating the nodes afterward. We wanted to eliminate those extra steps. 

The core idea of what would become Divisimate was simple: 

What if there was a piece of software that could split up anything you play on the keyboard into separate voices and send them to different instruments in your DAW? 

With the right template, it would become possible to perform realistic orchestrations on-the-fly and record everything directly in a sequencer. This would enable a whole new workflow for composers to simultaneously compose and perform. 

It is with this vision in mind that we created Divisimate.

Divisimate is a stand-alone software that runs independently from your DAW. It creates 32 virtual midi ports appearing in your sequencer as separate MIDI devices. Inside Divisimate, the entrance splits up any note input from your MIDI controller into individual musical voices. Each of these can then be routed freely across the output ports, which are then accessible in your sequencer. 

Most sequencers allow you to select a different input port for every instrument track. Once you’ve done that, every routing in Divisimate will represent a different instrumentation that you can then record in your sequencer. 

In addition to this, Divisimate’s functionality is extended using plugins allowing you to:

  • Transpose paths, send key switches, or even add rhythm to simple chords. 
  • Split the keyboard into three regions to perform melodies, bass lines, and chords independently.
  • Bring in small inconsistencies using the real-time humanization engine. 
  • Save and manage presets to switch instrumentations and voicings instantly.
  • Control your orchestration using the remote
 

We will cover all these features in this tutorial. This will give you a solid foundation to understand what this software can do and what potential it may hold for your personal workflow.

 Overview of the Divisimate Software

The Divisimate window has two main views: Orchestrate and Perform.

The Orchestrate view is used to assign voices to different outputs and build a specific orchestration using plugins and the matrix. Anything you change there can be saved into a preset on the Perform view.

On the Perform page, there are 20 quick load pads where you can assign and recall any preset you’ve built. You can fill up to five pages with your custom presets and switch between orchestrations on the fly without having to go through your preset finder.

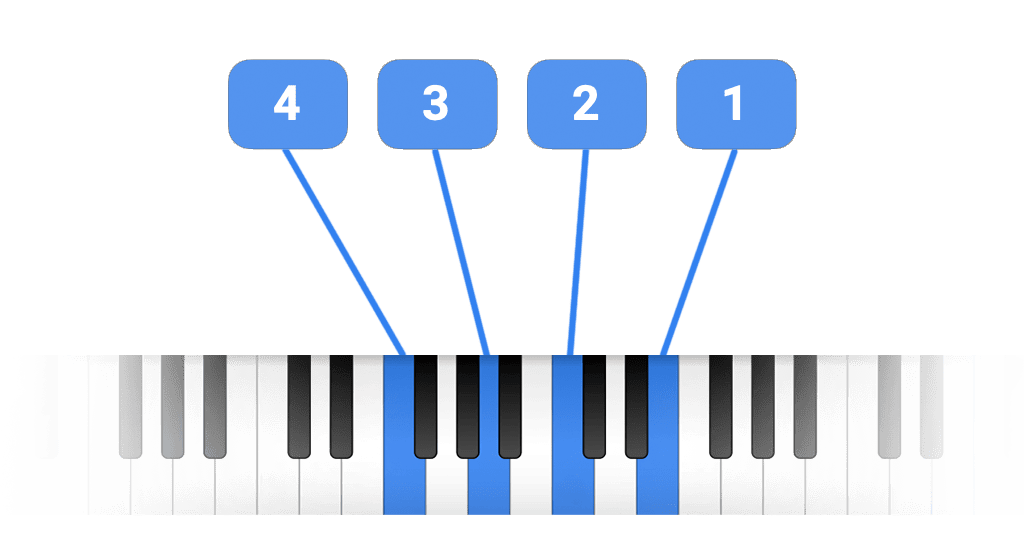
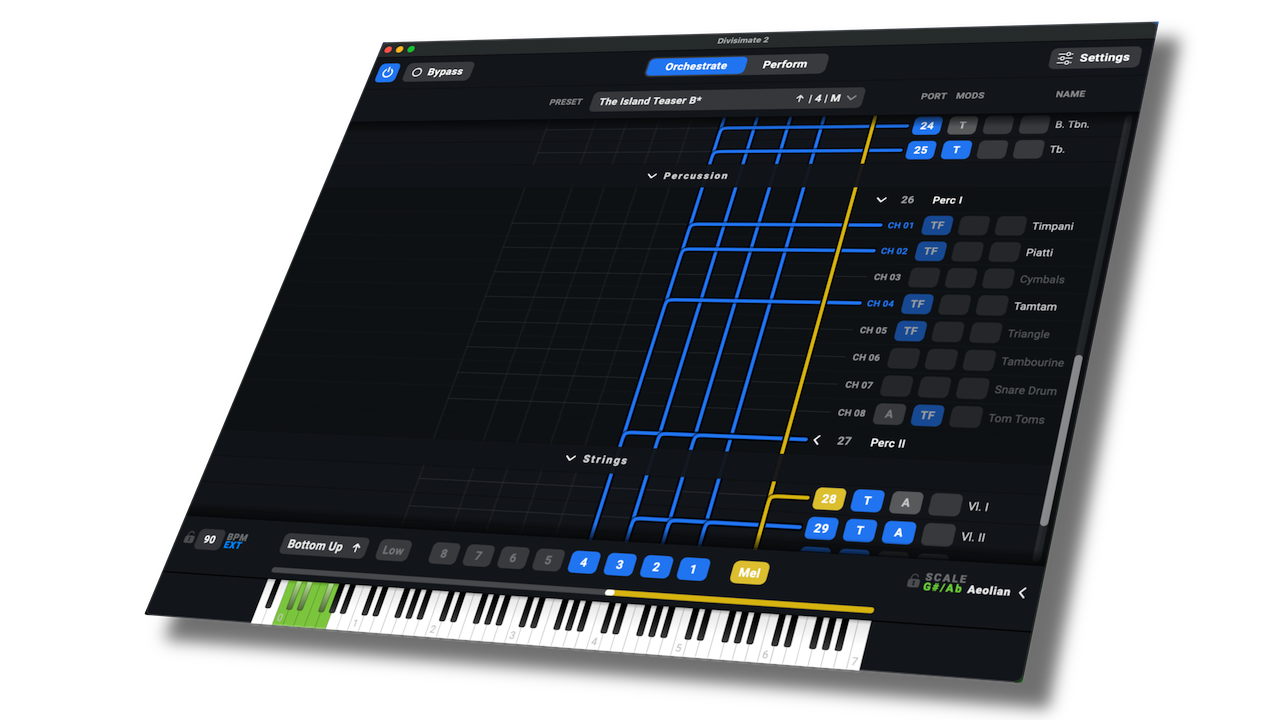
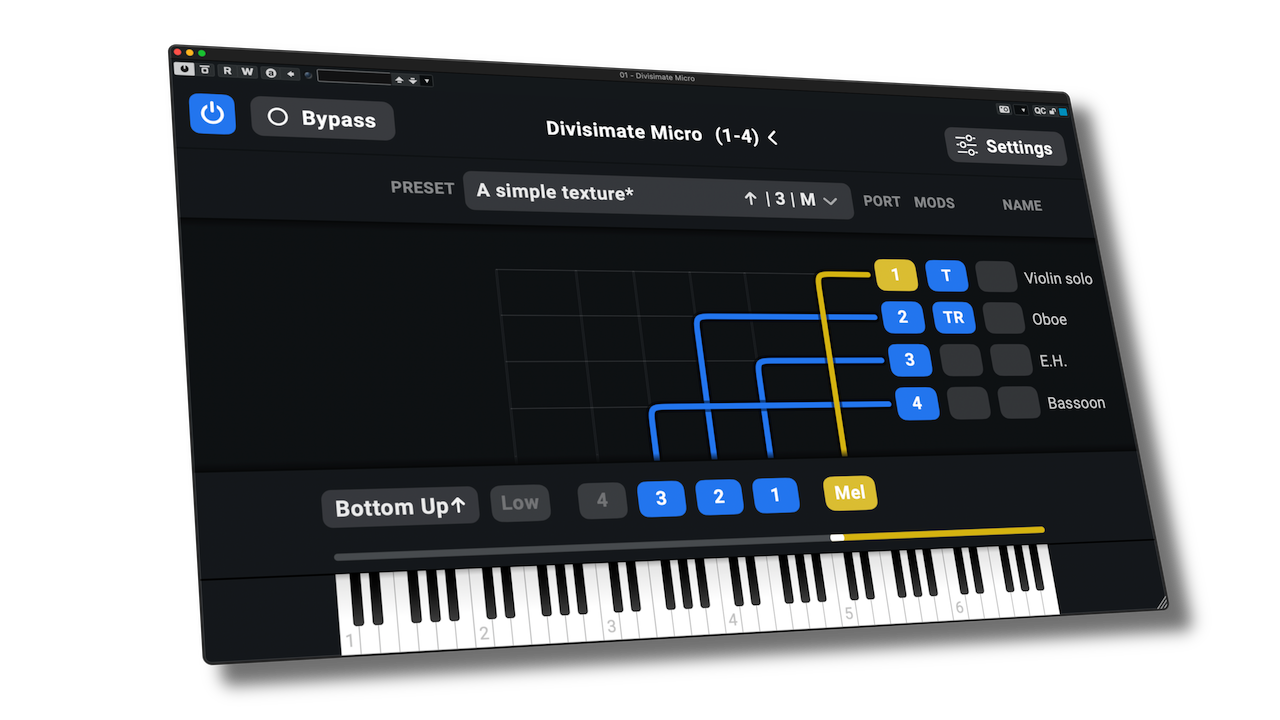
At the center of the Orchestrate page, you’ll see the matrix. There, you can route the separate voices at the bottom to the different media output parts to the right. The voices are sorted from bottom to top, left to right — the same way the notes appear on the keyboard. Voice 1 is the highest note of the current chord, voice 2 is the second highest, and so on. Simply click on an intersection on the grid to create or delete a connection.

If a port is active, it will also receive all controllers sent to Divisimate. You can route every voice multiple times. Depending on how many instruments you have loaded up, you can create doublings, have an instrument play an octave lower with a transposer plugin, or do all kinds of other audio manipulations.

Every orchestration you perform can be saved as a preset and recalled later. Once you have a template set up and connected to the ports, you can build any orchestration and play it live.

But what if you don’t want to use Divisimate in every situation?

The bypass button on the upper left corner can deactivate the engine and pass through all incoming notes and controllers to all parts latency-free. This means you can play any track receiving input from Divisimate in the “conventional” way and only use the Divisi functionality when it suits your workflow.

The power button, on the other hand, will turn off all notes and control data from Divisimate. If it’s set to OFF, all parts will be silent, all cache will be cleared, and any active notes will be stopped. So in a sense, it also works as a panic button, should you ever need it.

Understanding the Transposer Plugin

Transposer plugin

A great way to quickly and easily create nice voicings with simple chords in Divisimate is by using the Transposer plugin

On the Orchestrate page, there are three different plugins that can be inserted into the slots next to the part number. They will only affect the part they are assigned to. The first one is the Transposer

The Transposer does exactly what its name says: it will transpose all notes a set number of steps up or down. Since the most common use of this plugin is to transpose in octaves, we included buttons for quick octave transposition. This simple plugin opens up almost infinite possibilities to design your orchestrations. 

The Transposer is also great to use for Big Band voicings. If you have a couple of these different voicings prepared, you can try them out on chords and see which one you like the most. Or, you can use the Transposer to create a constant structure. 

This plugin went through major development improvements as part of the release of Divisimate 1.3. Since the 1.3 release, every Transposer instance has now the option to lock to a specified global scale

Though our initial tutorial video can still give you a good introduction on how this plugin works, we’ve since then released an updated video that gives you a detailed overview of the new and improved Transposer plugin, and how you can harness its power to create fantastic orchestrations.

The Repeater Plugin

Choose tempo. This is a global setting and applies to all Repeater plugins within the preset.

Enable external sync by listening to MIDI Clock on the Divisimate Loopback Port. This is a global setting and will affect all Repeater plugins in the preset.

Determine the length of the repeated notes.

Left <=> Right

Shorter <=> Longer

Stepper. Change the key velocity of the different steps of the pattern.

Activate and deactivate steps within the pattern. Deactivated steps will not play and generate no MIDI.

Add and remove steps to the current pattern. The maximum number of steps is 32.

Choose the rate of the pattern. Each step in the stepper will represent one of the selected time unit.

Choose the way the stepper should scale.

Dyn. via Key Vel: The stepper values will be scaled depending on the incoming key velocity (adding or subtracting the stepper amount)

Dyn. via CC#: Choose a CC number. The stepper values will be scaled between 0-127% based on the value of the selected CC.


Choose a CC#. Stepper values will be output on this CC in addition to key velocity values.

Save your own user presets.

The Repeater plugin can introduce automatic movement and rhythm to your
orchestration. Every port can have its own Repeater with their own individual settings. 

Having the option to combine Transposers and Repeaters on a single port and having different transpositions and rhythms between instruments opens up a world of possibilities.

On the top left, you can change the tempo of the Repeater. This is a global setting, so if you change the tempo in one of your Repeater plugins, it will change for all Repeaters within the current orchestration.

It’s also possible to synchronize the Repeater plugin with your DAW by sending a MIDI Clock signal to Divisimate. The process slightly varies between different DAWs but, in general, if you set your Repeater to External Sync and set your DAW to send MIDI Clock out to the Divisimate Loopback port, the Repeater will then follow the tempo of your project in your DAW.

But not all instruments have their dynamics react exclusively to key velocity. Some instruments, like the SWAM instruments by Audio Modeling, react to CC11 instead. For these instruments to play the rhythm programmed in the stepper with all its dynamics, we need to send out CC11 instead of Velocity. That’s what the Stepper Out to CC is for. If this option is active, the Stepper sends out CC data on the chosen controller number out to the instrument.

Finally, you can save and recall presets for this plugin. Since many different rhythms and setups are possible, you can organize them into sub folders. If you create a new folder in the Repeater preset directory, it will show up in the dropdown menu.

Presets and Perform View

Once you have created an orchestration or voicing, you may want to save it for later. Everything you do on the Orchestrate page can be saved into presets using the context menu on the upper side of the interface. This menu pretty much explains itself: 

  • Save As saves your preset under a new name into the dedicated folder. 
  • Save overwrites the currently loaded preset. 
  • Open lets you select a preset to load.
  • New lets you start from scratch and provides you with a completely blank matrix. 
  • Manage opens the folder containing all of Divisimate’s user settings and presets.
 

Feel free to set up your own folder structure within the presets folder to keep your orchestrations organized. You can delete or move unused presetscreate duplicates, or copy and paste presets from third parties. 

But the real fun with presets starts at the Perform view. We designed this page to change presets on the fly and keep our favorite orchestrations at hand. 

The Perform view always shows 20 rectangular buttons, to which you can freely assign presets of your choice. When you right-click on a slot, you can access a menu. There, you can assign an existing preset to the slot, or you can create a new preset to directly assign it. To remove the preset from the slot but not delete the preset itself, simply click on Clear

Once you’ve filled the Perform page with your favorite orchestrations, you can switch between them quickly by clicking the different buttons.

When a preset is assigned, the button will display a few of things: 

  • the preset name
  • a list of the instrument names included in the preset
  • the slot’s number
  • the number of voices and the active ranges
 

Having all this information, you can now simply record-enable all tracks routed from Divisimate, and switch between orchestrations without even touching your sequencer

You can even change presets during playing. If the sustain pedal is down or there are still notes playing, Divisimate will pre-load the selected preset and complete the loading the very second all notes and the pedal are released. This way, the Perform view is not only a place to organize your presets, but it’s also invaluable for quickly changing orchestrations during your performance.

Since the release of Divisimate 1.3, we also introduced the Performance Manager. This feature allows you to save and recall different layouts of the Perform page with different presets within Divisimate. So if you have different projects or templates you’re working on, you can simply create different Performances for each of them using the same organization and the exact selection of presets you need.

Voices and the Divisi Engine

The heart of Divisimate is the Divisi engine—this is the algorithm that splits up your live input into separate voices. For the engine to work correctly, you must first select the number of voices you want to play.

If you want to perform simple triads, select three. If you want to play four-part voicings, select four. And if you want to play single-note unisons, select only one voice. It goes up to eight voices allowing for pretty complex harmonies, as long as you’re able to play them.

The engine needs a few milliseconds to analyze the incoming notes. You can adjust this time on the Settings page with the Analysis Time slider.

There are currently three Divisi modes you can choose from:

  • Top Down
  • Bottom Up
  • Fill Voices
 
The Fill Voices mode allows you to play passages going from unison to fully orchestrated. It does this by always assigning a note to each instrument, no matter how many notes you’re playing. So if you’re playing a single note, all your instruments will play in unison. If you play more than a single note, these notes will be spread out evenly across the voices to create a sound as balanced as possible. This mode is a relatively recent addition to Divisimate. It’s powerful and allows for intuitive playing. For this reason, it’s now the default mode set when you open up Divisimate. 

The Bottom Up mode used to be the default mode in the first versions of Divisimate. In this mode, all notes are assigned to the voices, from lowest to highest. If there’s a single note pressed, the note will be assigned to the lowest voice and the other instruments will stay silent, unless there’s a previous full chord voicing in memory. 

If this happens in the middle of a performance, Divisimate will remember the last full chord and assign the voices in a way that each voice has the smallest leap from the preceding note. You can adjust the time in milliseconds on the Settings page to tell Divisimate how long it should keep this information in memory.
 

Finally, the Top Down mode works exactly the same as Bottom Up, except that it will assign notes to the voices from highest to lowest. In this mode, the lowest voice will be the last one to receive a note. This can be useful if you want a melody line to be supported by chords only sometimes, but not all the time. 

Understanding Low and Melody Ranges

There are two more buttons in the row where you see the eight voices: one to the left, and one to the right. These are the low and melody ranges. By clicking on these buttons, you can activate keyboard ranges and define them by dragging the sliders above the keyboard. All notes performed within these ranges will be ignored by the Divisi engine and will just be sent through. Both ranges can be routed, just like the voices, to any port while still being affected by the plugins.


A great use for the ranges is to perform chords and melodies simultaneously and independently. Let’s take the example of a small string section set up with chamber strings and some layered solo strings for definition. In this fictional preset, the violas, celli, and basses are set up to perform open voicings. When playing three-note chords, you can assign the first and second violin to the melody range and let them play in octaves using the transposer. Now, you can play low string chords in the left hand and a violin melody in octaves in the right while controlling dynamics with a breath controller.


There are many different ways these ranges can be used. You can have key switches in those ranges or use them to play an independent bass line. Since they are free and polyphonic, you can play a keyboard instrument in the range and have the orchestra playing chords. You can also have numerous orchestrations ready for live performances at any time.


The Trigger Plugin

Apart from the Transposer, there are currently two more plugins you can add to the ports. One of them is the Trigger. This is a very specific but extremely useful plugin.

The Trigger sends controller data on whenever it’s initialized. On a preset load, you can program up to eight different actions and give each action a name to remember its function. The main use for this is changing articulationsapplying mutes, or changing any other controls your instruments are offering at the same time as a preset change.

This way, you can get even more detailed with your orchestrations and change both articulations and voicing for many instruments at a time between presets. This is quite useful for template building, especially if your instruments have different key switches for articulations, or if some of them change by key switch and others by controllers.

Humanizing Your Orchestrations

In an ensemble, big or small, no two musicians will ever play the same note at the exact same time, in the exact same way. Little differences in timing and dynamics are what make the performance believable and authentic. 

Divisimate can help with this kind of detail in your orchestrations. 

On the Settings page, there are four sliders that control four different factors of humanization: 

  • Note timing brings some variation to the note length and attacks.
  • Velocity randomly shifts the note velocity of every individual node.
  • CC timing will offset the controller input for identical parts so they don’t line up exactly.
  • CC value will make sure that instruments who play the same notes don’t receive identical controller levels. 
 

All these sliders control how strong the effect of these humanization types will be. Set to zero, everything will be identical. Set to one, everything will be terrible (just terrible, seriously, it’s going to be a mess).

A little goes a long way here. Handle a few sliders with care and use them in moderation. 

Humanization especially makes a big difference with multiple instruments playing in unison—for example, a big band brass section playing in octaves. Without humanization, you’ll hear the attacks of the notes all line up exactly. There’s no way an actual ensemble would play like this! 

The humanization effect is subtle but it does make a difference. The attacks and crescendos within the ensemble are much more realistic and give less of a static feeling, especially on large orchestrations. 

Bringing in this kind of inaccuracy can be very helpful to increase the realism of your performance or recording. It also saves a lot of the time it would take to create this kind of effect manually.


Using the DivisiControl App

Playing different orchestrations with Divisimate is great, but what kind of music pieces ask for having the same orchestration the whole time through? That’s why it’s important to have a way to switch easily from one orchestration to another while you’re playing. We came up with a few different methods for precisely that.

Of course, you can use your mouse to load the presets you’ve arranged on the Perform page, but it might be easier to use a tablet or another mobile device for switching presets on the fly. For this reason, we created our mobile app DivisiControl available for iOS and Android. It can be downloaded for free from the App Store for iPhones and iPad, and on Google Play for Android devices.

DivisiControl connects to Divisimate on your computer through your local network, so it’s important to make sure both your devices are connected to the same network. Additionally, make sure Divisimate has the necessary permissions to access the network on your computer.

When you open DivisiControl on your mobile device, it will recognize all running instances of Divisimate on your network (usually there’s only one). A tap on the icon will start the connection between the app and Divisimate and sync the Perform pages. You’ll then be able to swipe through pages and load or re-load presets, and Divisimate will follow the app closely.

The bottom of the app displays important information (number of voices, Divisi mode used, keyboard ranges, etc…) of the current preset. Once you have your template set up, you can perform only by looking at the app and always know key information about the preset you’re currently using.

If you’re using a device with a smaller screen, the app will sacrifice a little bit of that information in order to keep the pad buttons wider and readable. If you rotate your device from a horizontal to a vertical view, the app will adjust by showing only half of the Perform page on the screen to keep the pads at a usable and readable size. So, for example, if you have five pages with 20 presets to swipe through on a horizontal view, switching to a vertical view will give you ten pages to swipe through each with ten presets.

Links and Resources

Hopefully, you found this Getting Started guide helpful for kick-starting your work with Divisimate.

Before you go, here’s a list of resources you might want to have a look at:

If you’d like to watch video tutorials, don’t forget to subscribe to our YouTube channel. We post regular tutorial and performance videos.

If you’re looking for information about using Divisimate with your specific DAW, please check out our Resources page where we have quick start guides for all the main DAWs, as well as Divisimate’s User Manual.

Lastly, we also make available free Templates and Performances for Divisimate users which you can download here. These templates are specifically designed to save you time in setting up common orchestrations most composers use so do take advantage of these resources, it’s free!

To stay up-to-date with all the latest news and releases, follow us on InstagramFacebook, or Twitter.

We’re also always happy to hear your feedback and comments. We’re here to answer your questions, so feel free to reach out to us at any time through the Support page.

Open the door to a whole new workflow

Divisimate is available as a standalone software for Mac and PC. The remote control app “DivisiControl” is available for iOS (iPad and iPhone) and Android (Phone & Tablet)

$199 | 175€ | 155£

subject to VAT depending on your country