Using the Divisimate Micro Plugin Out in different DAWs
With Divisimate Micro 1.1 you no longer have to use Divisimate Ports to address different instruments through Divsiimate Micro. Instead you can use the MIDI output of the plugin itself to route the signals within the DAW. The first part will be sent out on MIDI Channel 1, the second on channel 2, the third on channel 3 and the fourth on channel 4. This allows you to have an unlimited instances of Divisimate Micro in your session and eliminate the need to go outside the DAW and back again. But it works a little differently in each DAW. So in this guide we will have a look at the process of setting this up in different DAWs and hosts.
Click on your DAW of choice here:
Cubase | Logic Pro | Studio One | Reaper | Digital Performer | Camelot Pro | Pro Tools | Bitwig
Note: Unfortunately the Plugin Out functionality can not be used in Ableton Live and UAD Luna at this time, as plugin MIDI output can not be split up by channel in those DAWs. We hope for this limitation to be removed in the future, but for now, users of Ableton Live and Luna have to stay with the Divisimate Port workflow.
Cubase
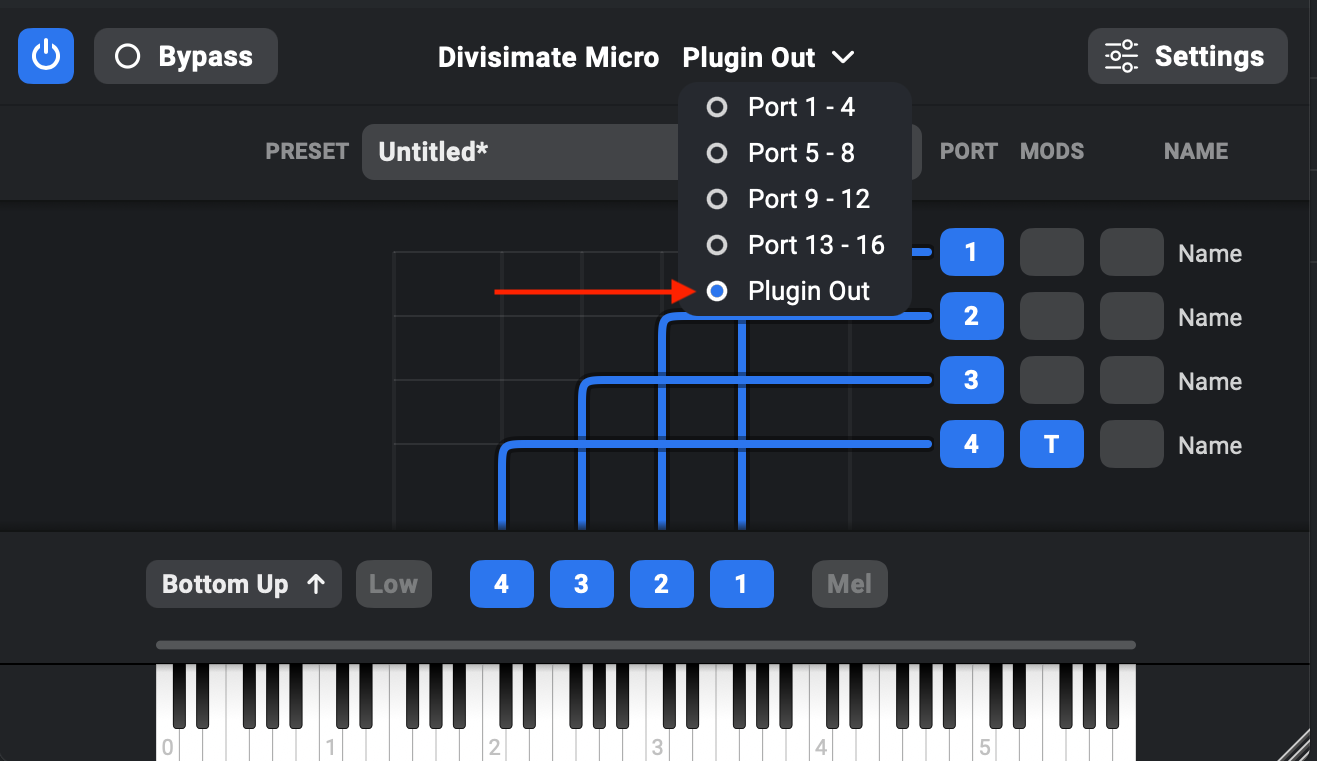
First create an instrument track with Divisimate Micro and open the plugin. In the port configuration menu, select the "Plugin Out" option.
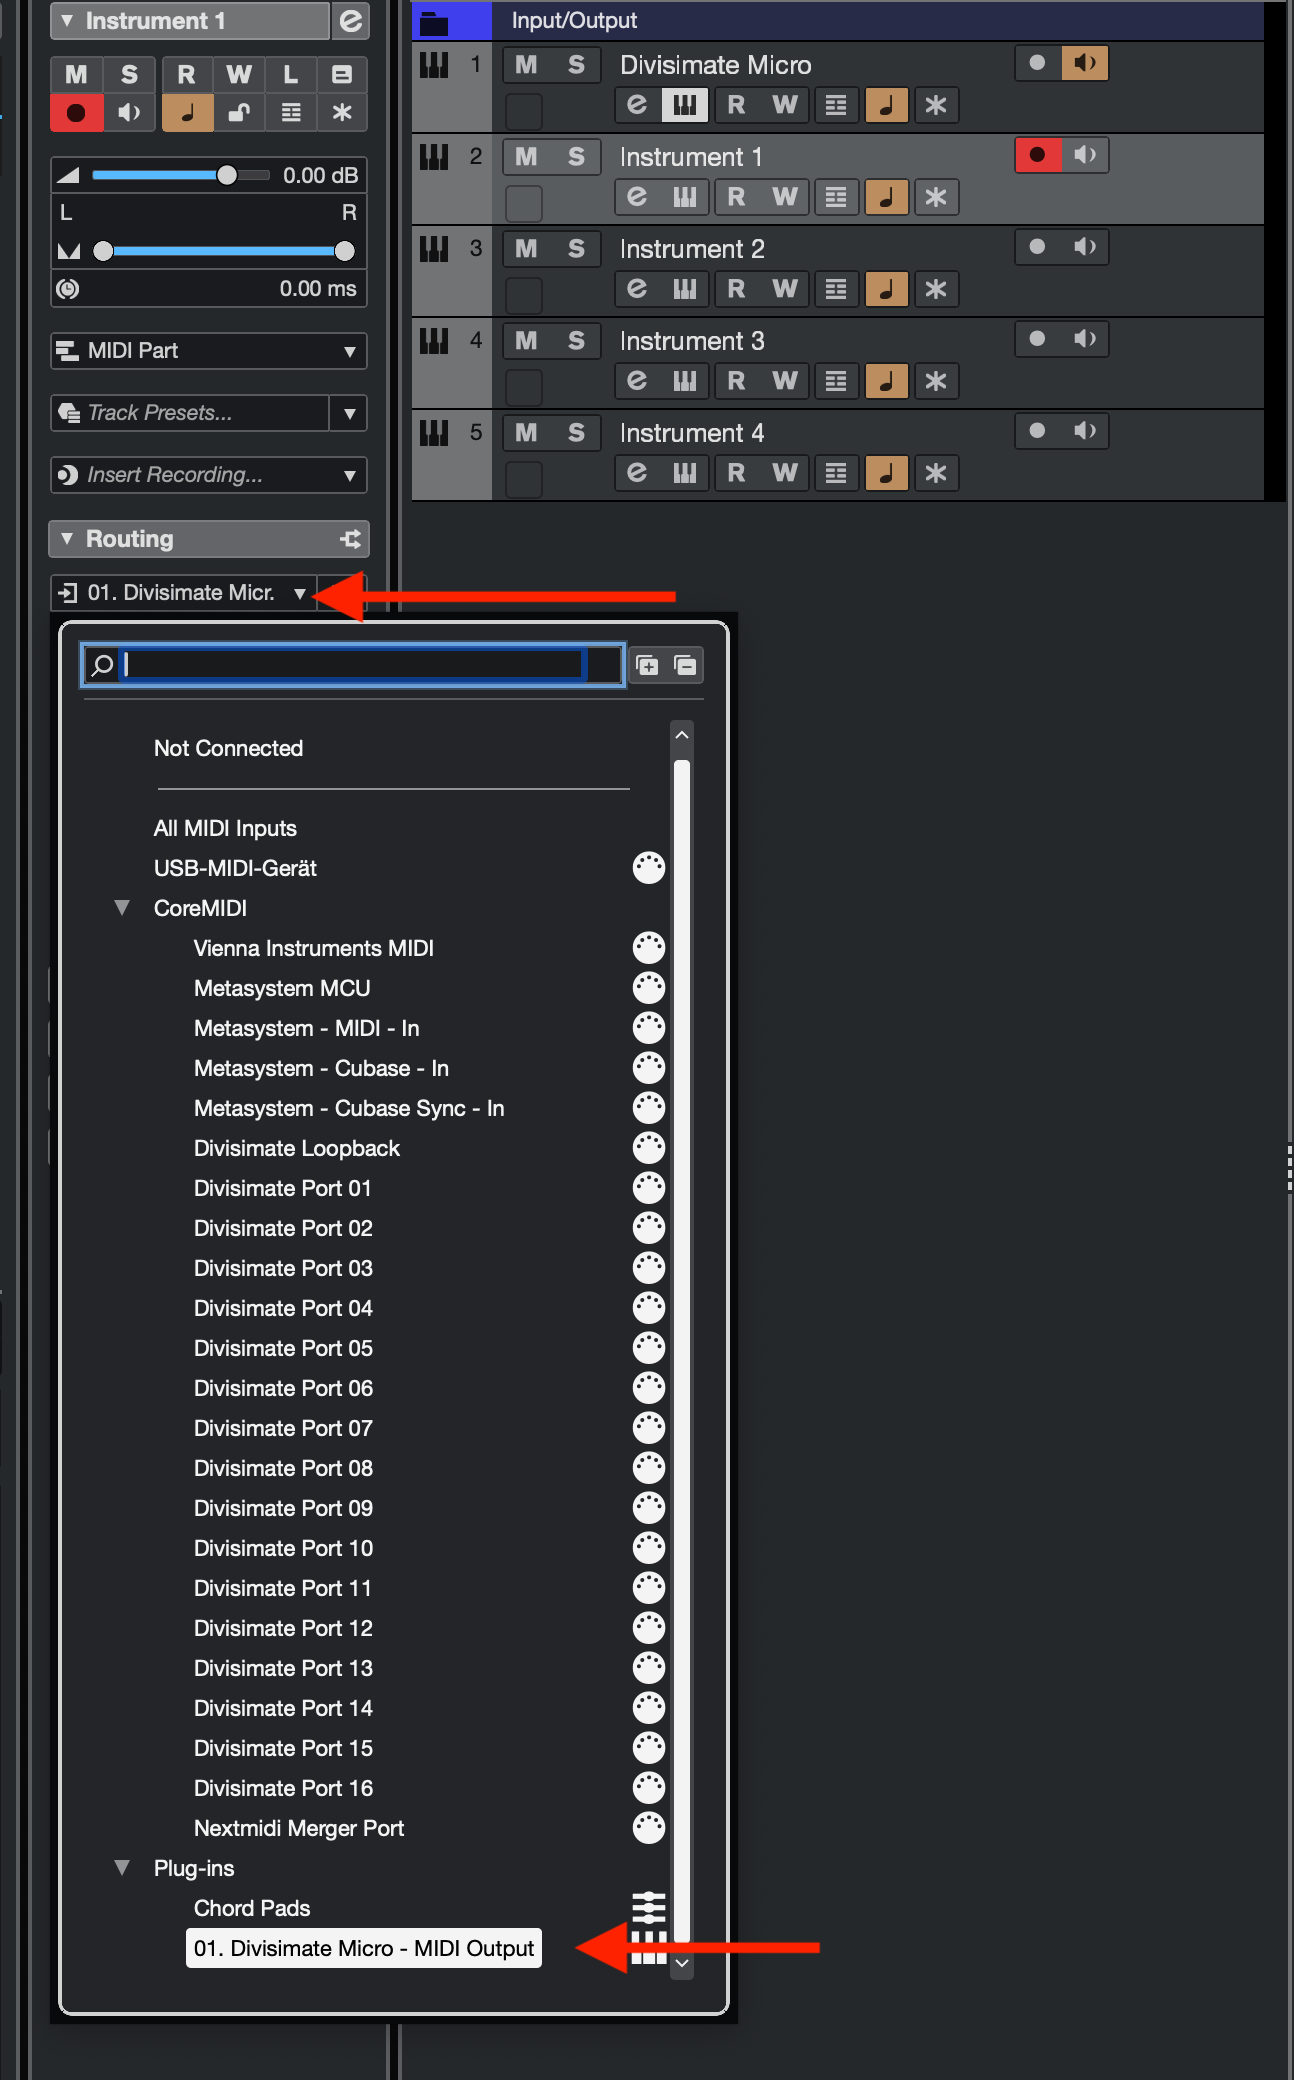
Then create four additional instrument tracks that you want to connect with Divisimate Micro.
On each of these instrument tracks go to the inspector on the left hand side and in the "Routing" section select "Divisimate Micro – MIDI Output" as the input.
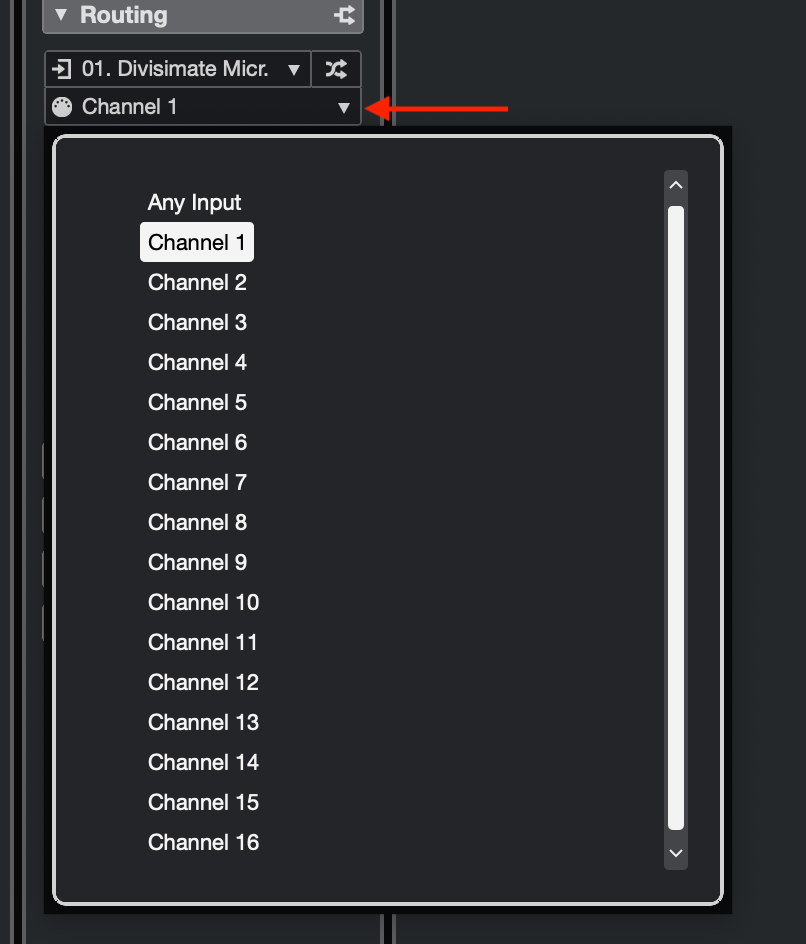
Then just below that select Channel 1 on the first instrument, Channel 2 on the second instrument and so on.
Now you can record enable all five tracks and play your four instruments through Divisimate Micro with purely internal routing.
Logic Pro
First create an instrument track with Divisimate Micro and open the plugin. In the port configuration menu, select the "Plugin Out" option.
Then create four additional instrument tracks that you want to connect with Divisimate Micro.
For each of these tracks do the following: In the inspector on the left on your instrument tracks there are multiple MIDI Input options. First put the setting under "MIDI input" (which is external MIDI devices) to "Off".
Then head down to "Internal MIDI In" and under "Instrument Output" select the Divisimate Micro instance. A neat detail here is that the displayed name actually reflects the track name. This makes it easier for you to keep many instances of Divisimate Micro organized.
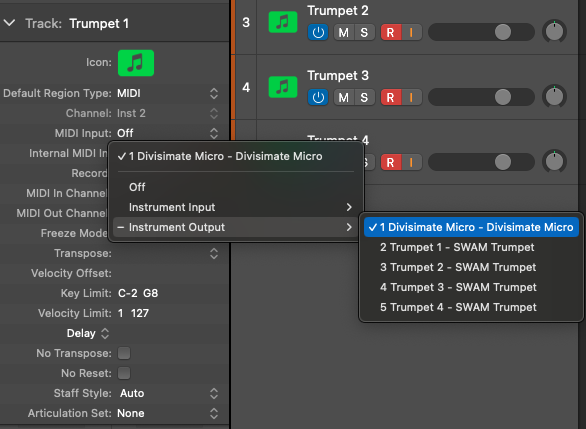
Next a little further down go to the setting "MIDI In Channel" and select Channel 1 for your first instrument, Channel 2 for your second, Channel 3 for the third and Channel 4 for the fourth one.
Studio One
First create an instrument track with Divisimate Micro and open the plugin. In the port configuration menu, select the "Plugin Out" option.
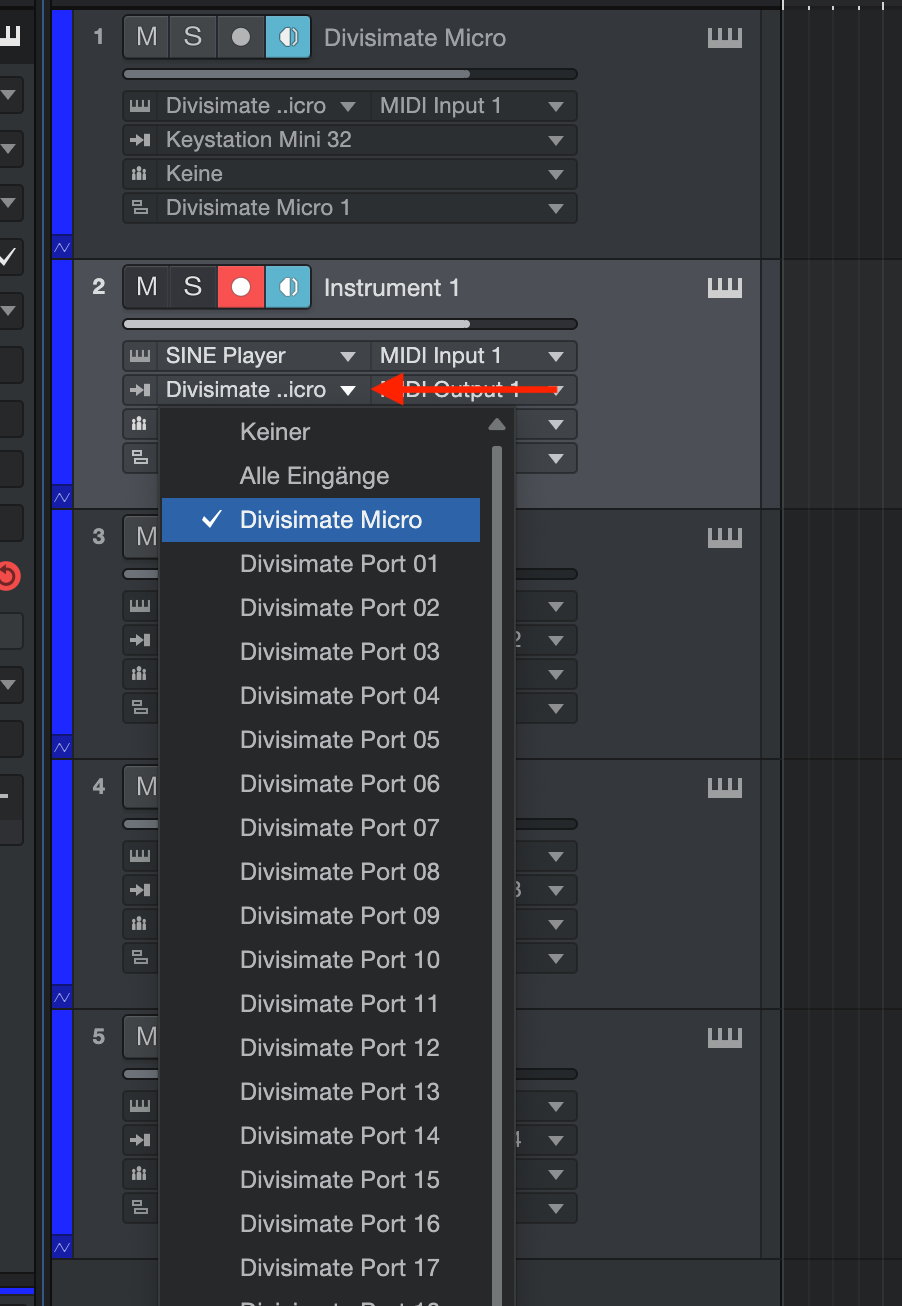
Then create four additional instrument tracks that you want to connect with Divisimate Micro. On the controls of these instrument tracks you should see the input selection. You may need to extend the track height a little. Here you should select "Divisimate Micro".
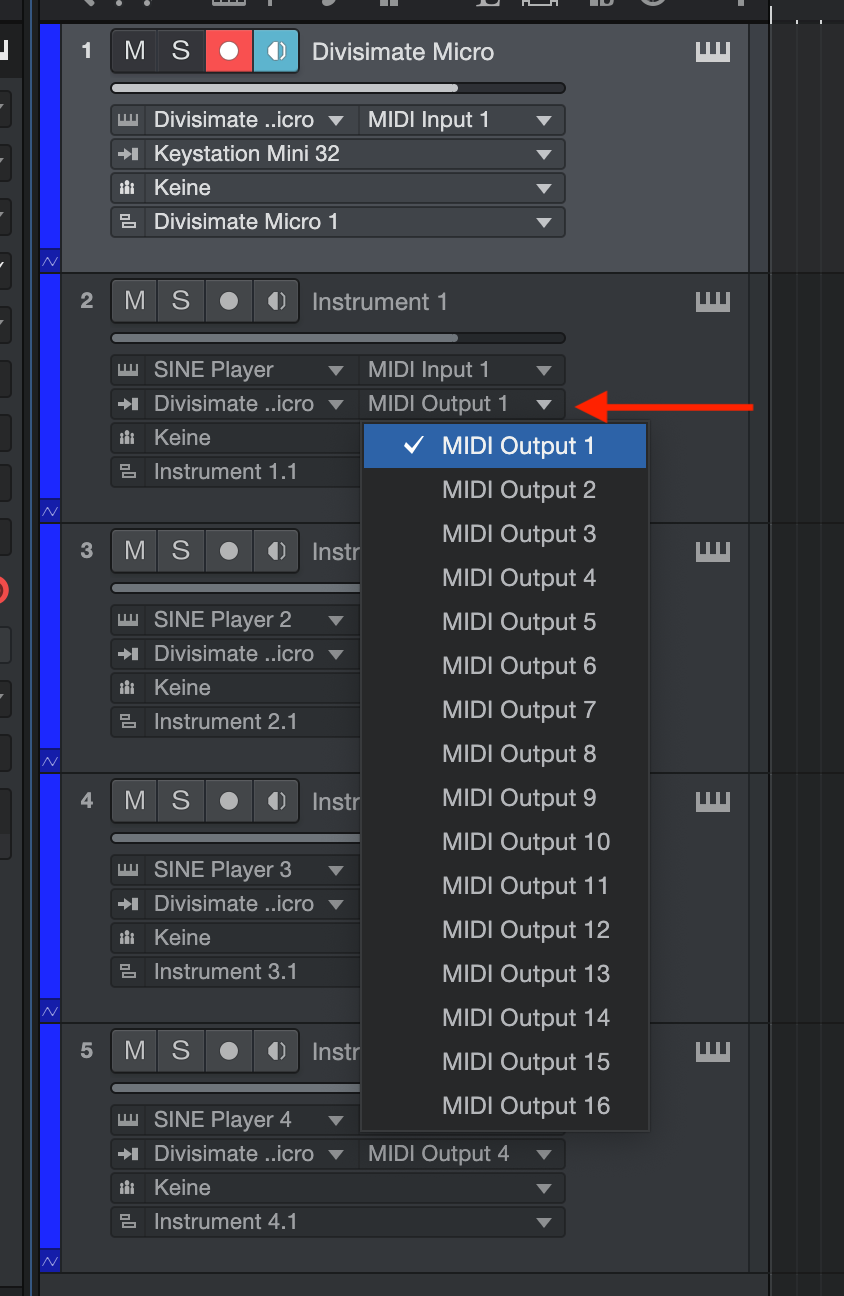
Then right next to that menu select "MIDI Output 1" for your first instrument (That would be MIDI Channel 1), "MIDI Output 2" for your second instrument and so on.
Now you can record enable all five tracks and play your four instruments through Divisimate Micro with purely internal routing.
Reaper
First create an instrument track with Divisimate Micro and open the plugin. In the port configuration menu, select the "Plugin Out" option.
Then create four additional instrument tracks that you want to connect with Divisimate Micro. On the track settings, set the main input of your instrument tracks to Input: none.
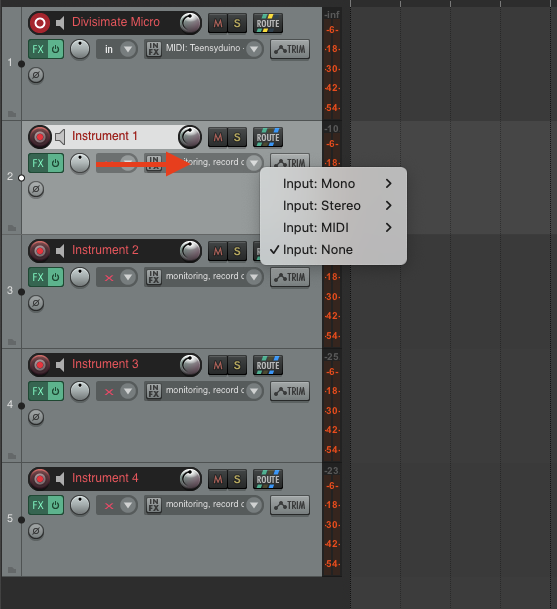
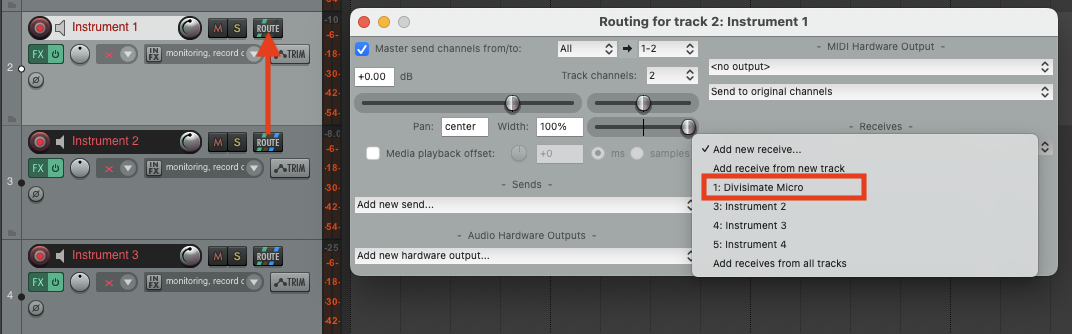
Next on every instrument track click the "Route" button and add Divisimate Micro as a "new receive".
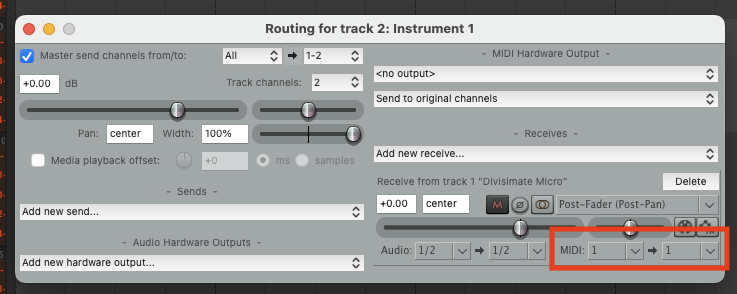
Then in the lower right corner of the Route window, select the appropriate MIDI channel and send it to channel 1. 1 → 1 for the first instrument track, 2 → 1 for the second track, 3 → 1 for the third and so on. This sets each track to listen to a specific MIDI channel only, but pass it on to the instrument as channel 1 (which most virtual instruments default to).
Digital Performer
First create an instrument track with Divisimate Micro and open the plugin. In the port configuration menu, select the "Plugin Out" option.
Then create four additional instrument tracks that you want to connect with Divisimate Micro. On the input selection of your instrument tracks you should see the option to select "Divisimate Micro" as an input. The sub-menu on the side will immediately let you choose a MIDI channel as well.
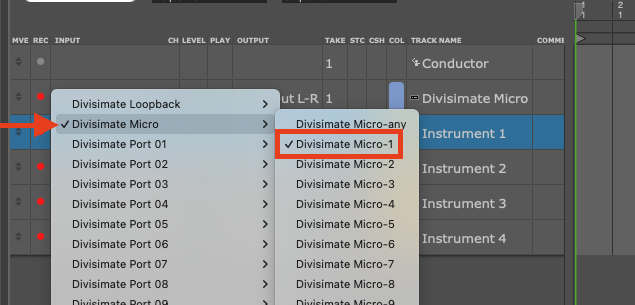
Select Divisimate Micro-1 for your first instrument, Divisimate Micro-2 for your second one and so on. And that should already be all - record enable all five tracks and you should be able to play!
Camelot Pro
Camelot Pro is a special case, as Divisimate Micro can actually be used as a MIDI Pre-Processor here. This means that you can hav Divisimate Micro as a MIDI Pre-Processor on any layer and then add four instruments on the same layer that filter the resulting output of Divisimate Micro by MIDI Channel.
Here's how you can set this up step by step:
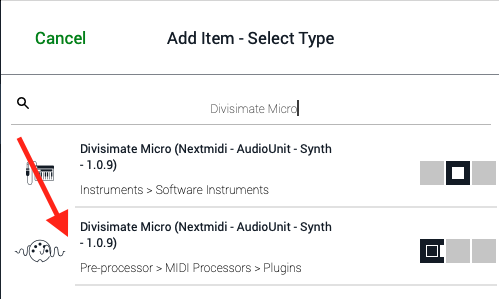
First on an empty layer add a new "Pre-Processor" and choose Divisimate Micro. Make sure that you add it as a Pre-Processor specifically, not as an instrument.
Now go into Divisimate Micro and make sure that the output configuration is set to "Plugin Out".
Next you can add up to four instruments on the same layer.

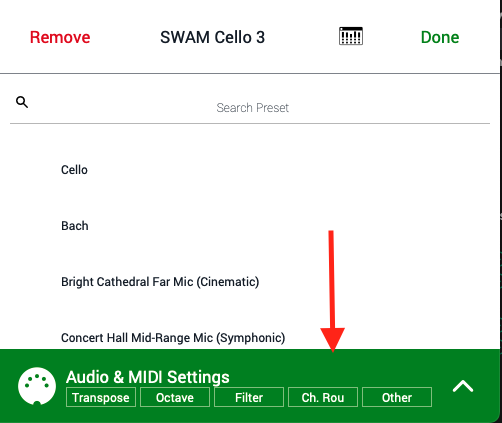
Now we want each instrument to filter for a specific MIDI Channel. When you click on each instrument you will see the option to go to the Audio & MIDI Settings on the bottom right.
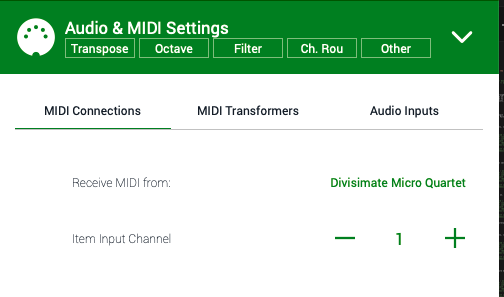
Within these settings you will find the option to select the "Item Input Channel". For the first instrument select here channel 1, for the second one channel 2 and so on.
Now your four instruments should be playable through Divisimate Micro. This layer configuration can be recalled and loaded without interference with other Divisimate Micro instances. It really is quite powerful.
Pro Tools
First create an instrument track with Divisimate Micro and open the plugin. In the port configuration menu, select the "Plugin Out" option.
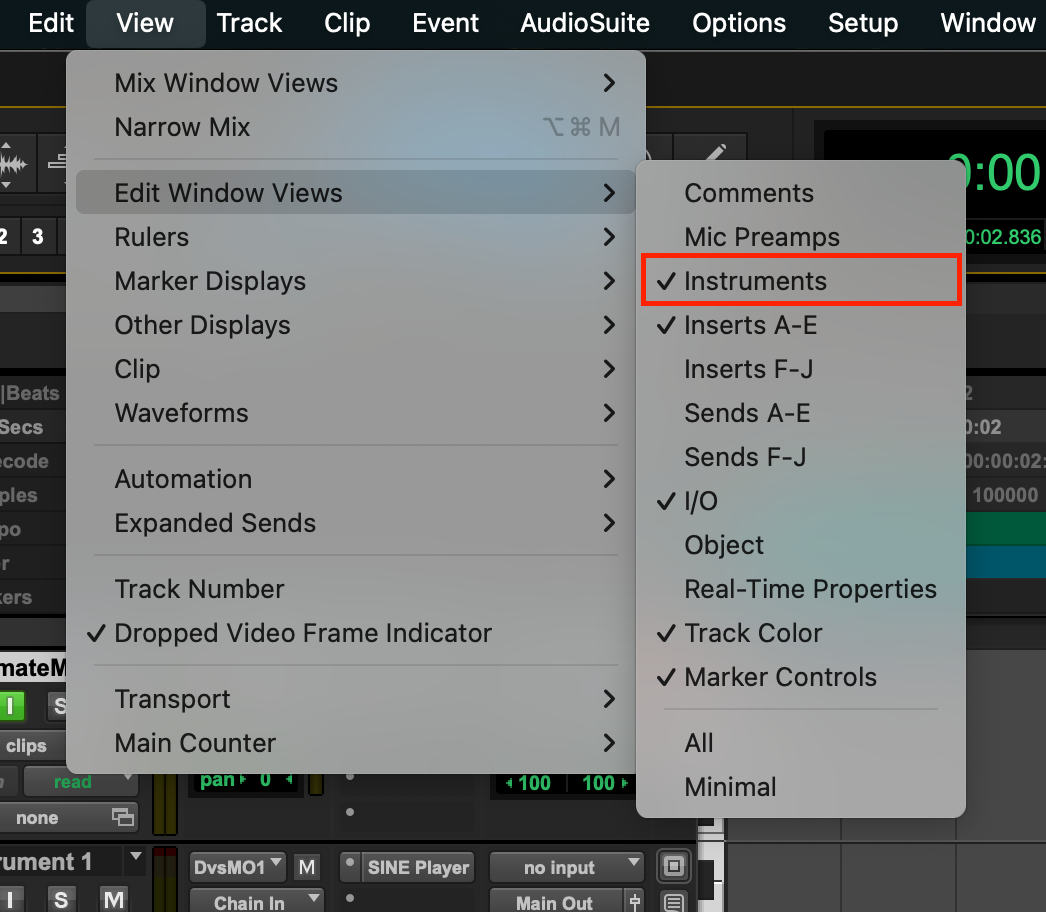
Make sure the Instrument pane is visible by going to View > Edit Window Views and check the Instruments option.
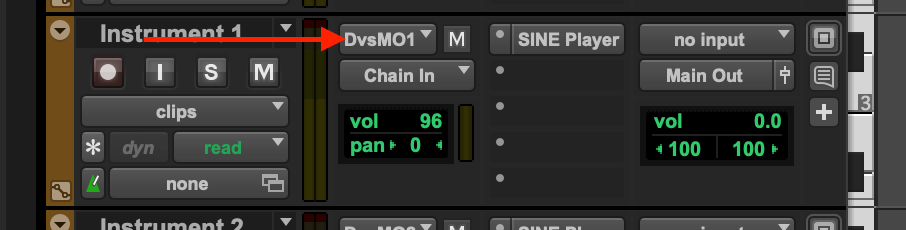
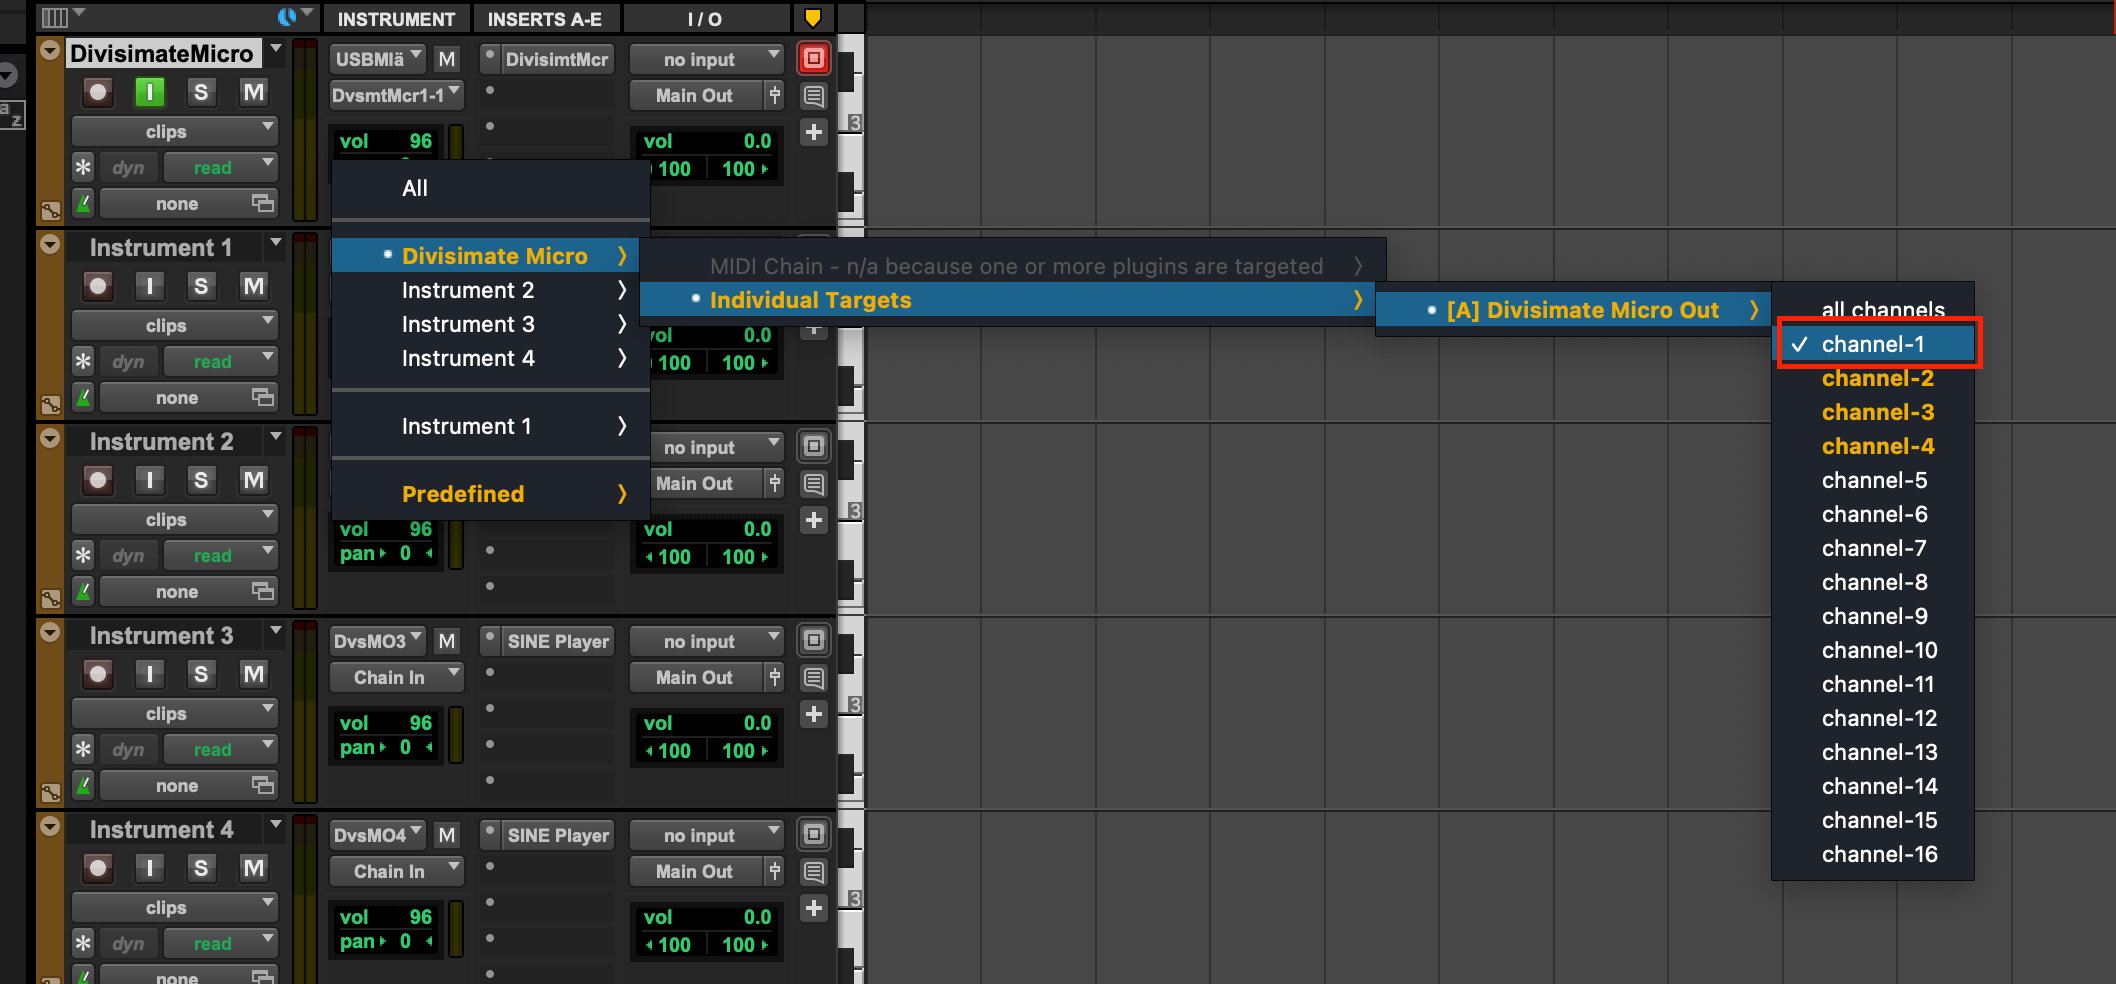
On the Divisimate track, set the input to your keyboard controller and the instrument output (not the track output!) to Divisimate Micro > Individual Targets > Divisimate Micro 1 > Channel 1
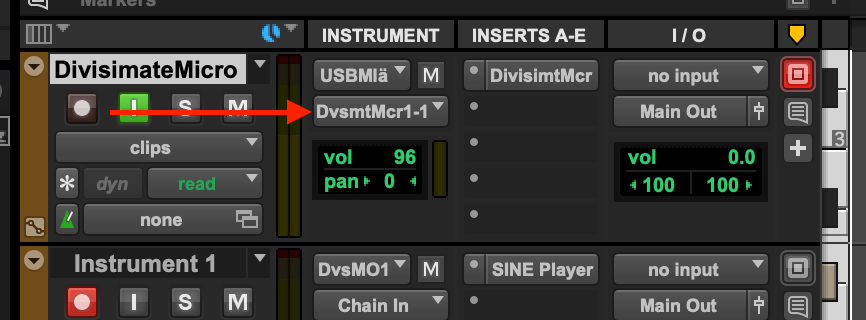

For the individual instrument tracks, make sure the instrument output is set to Chain In and the track input is set to no input.

Set the instrument input for the individual instruments to Divisimate Micro > Individual Targets > Divisimate Micro 1 > Channel 1 through Channel 4 respectively.
Now you should be able to ply the four instruments.
Bitwig
First create an instrument track with Divisimate Micro and open the plugin. In the port configuration menu, select the "Plugin Out" option.
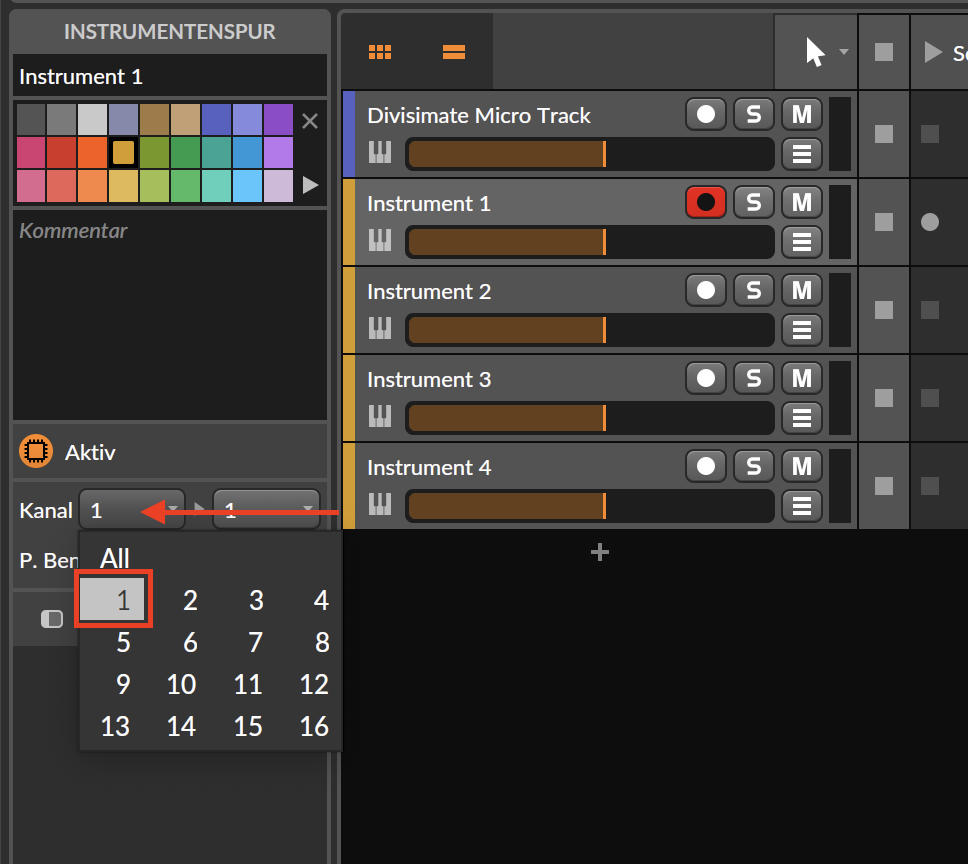
Change the input of each of the instrument tracks to the plugin output of Divisimate Micro.
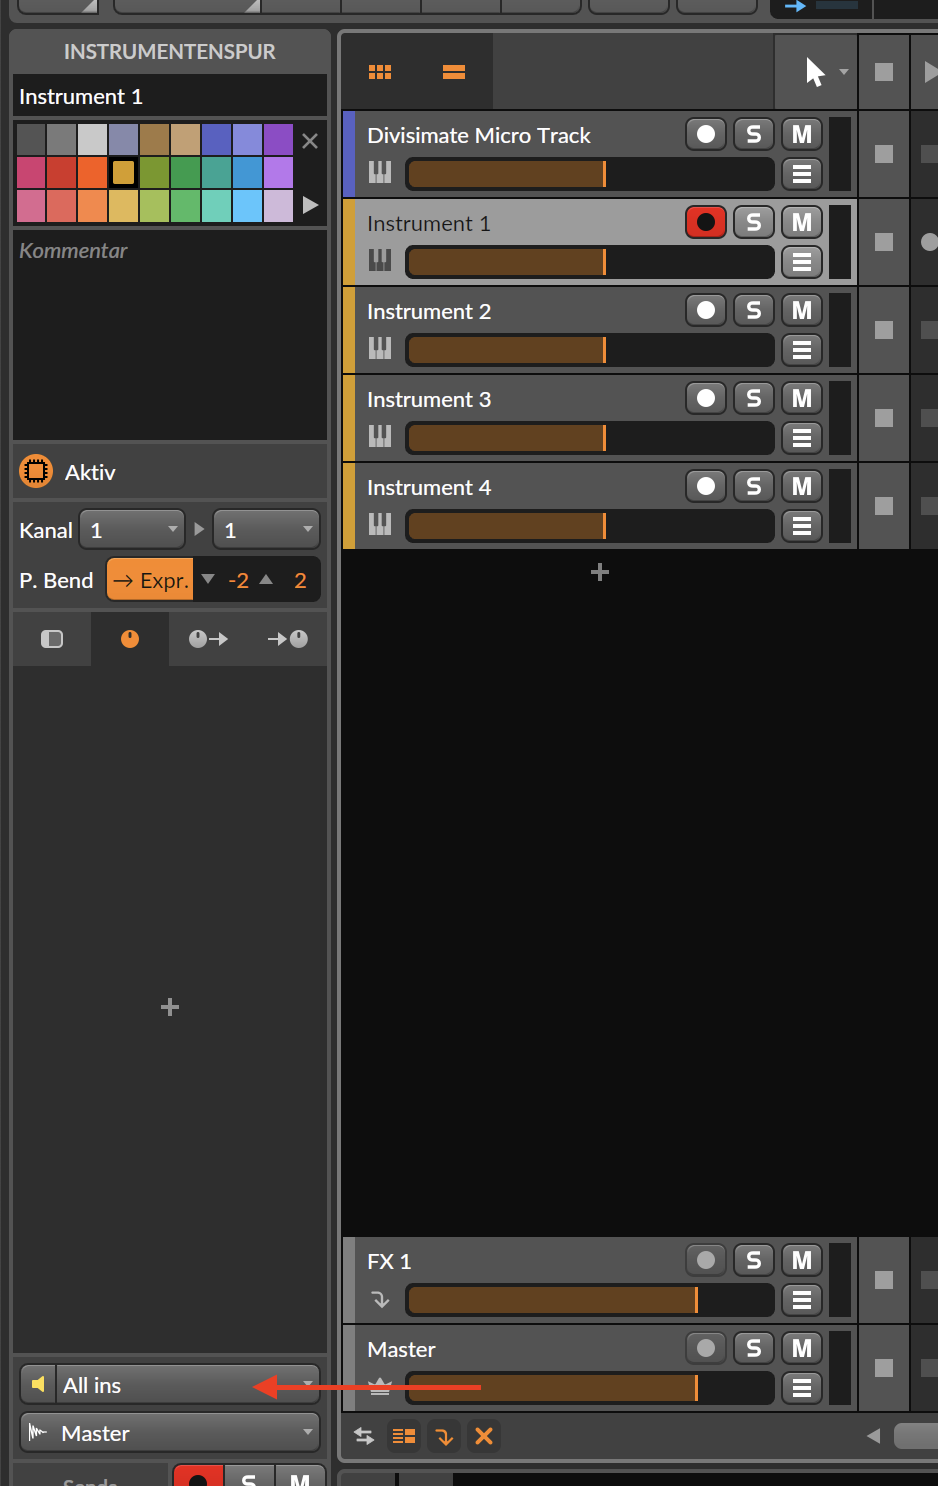
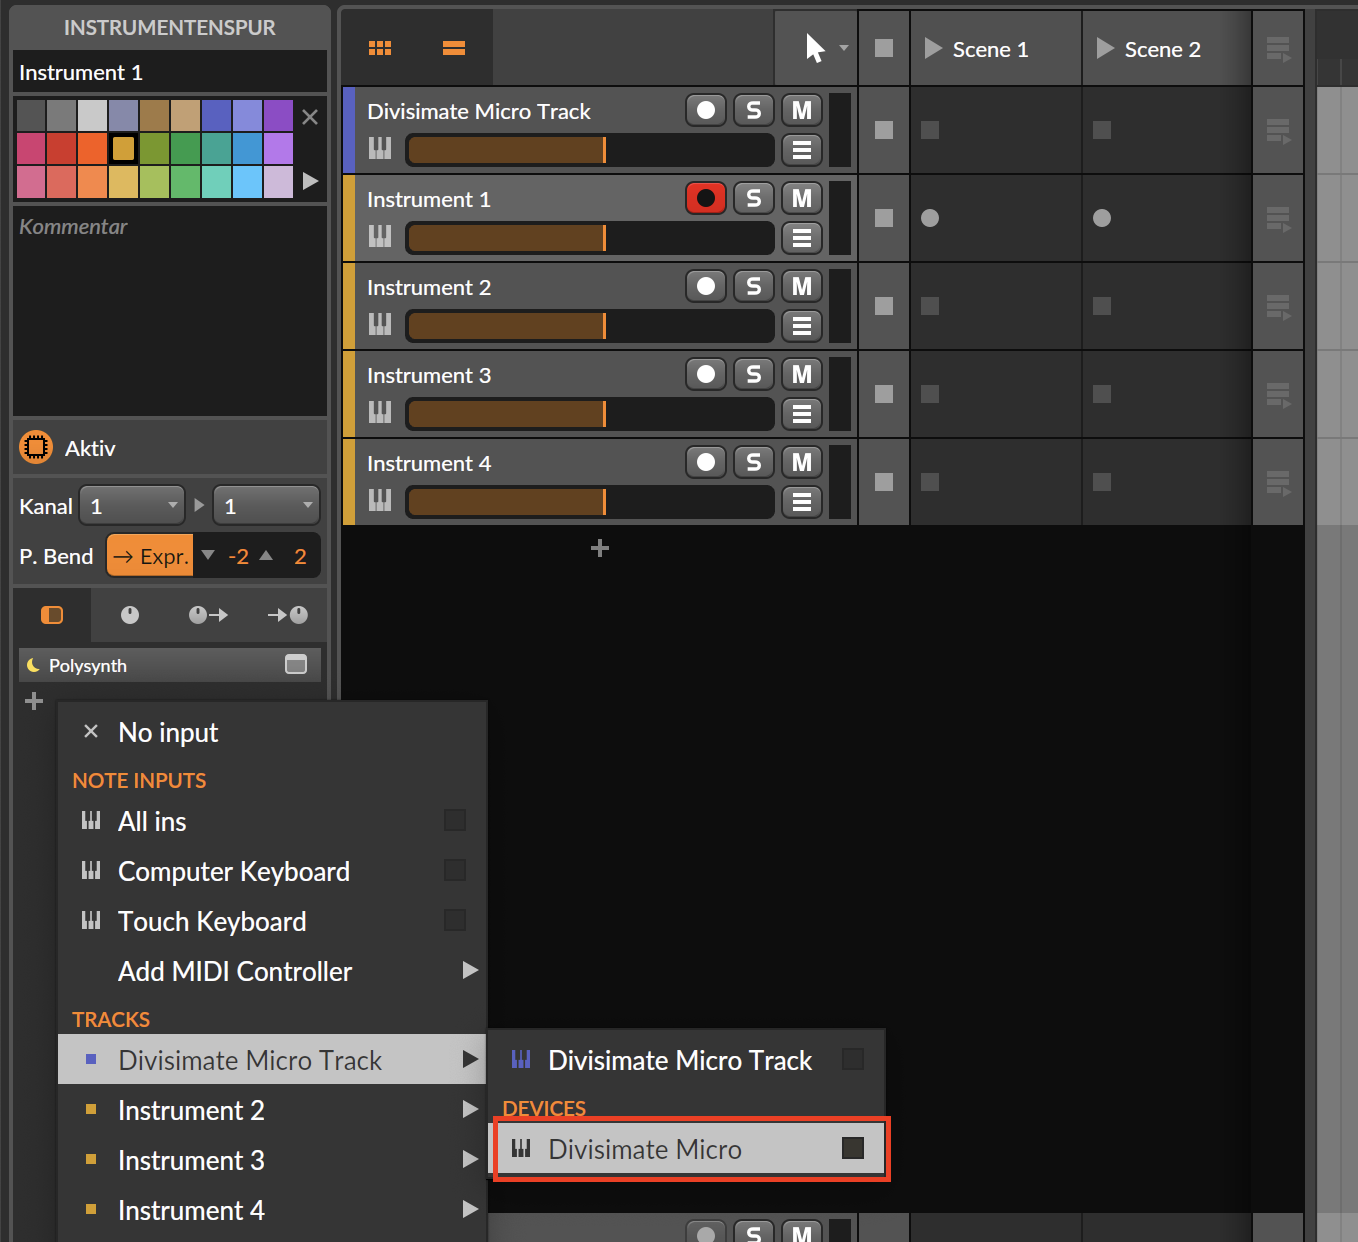
Set the input channel for each instrument track to 1 through 4 respectively.